If you are moving your email from a 'Your Co-op Broadband/Midcounties' account into a new mail.coop account, you may be using the calendar functionality, and wish to copy your calendar entries into the new mail.coop webmail tool. This article takes you through this straightforward process.
It is essentially a 2-step process: firstly you will export the calendar data from your account at webmail.myphone.coop, and then you'll import this file into the calendar of your new mail.coop account.
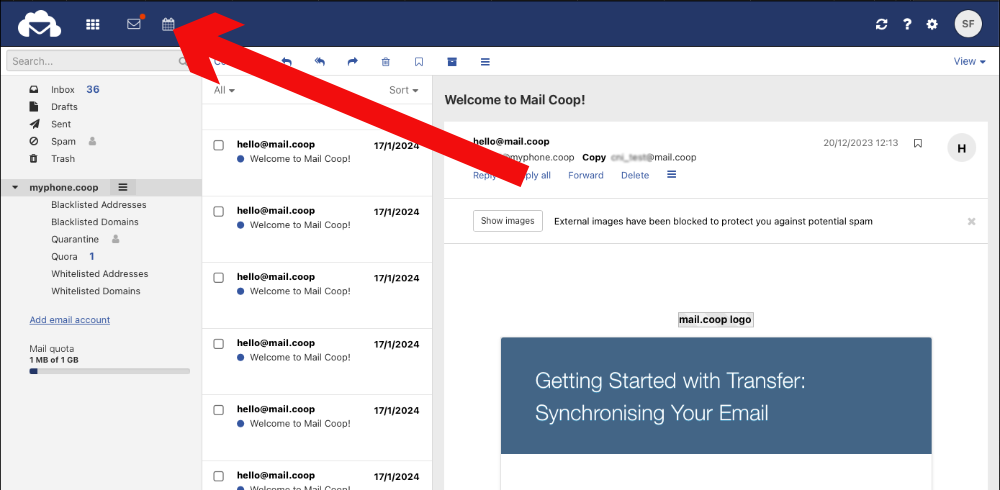
Log in to your old account at https://webmail.myphone.coop, and select the calendar by clicking on the little calendar icon you'll see in the top menu bar towards the left.
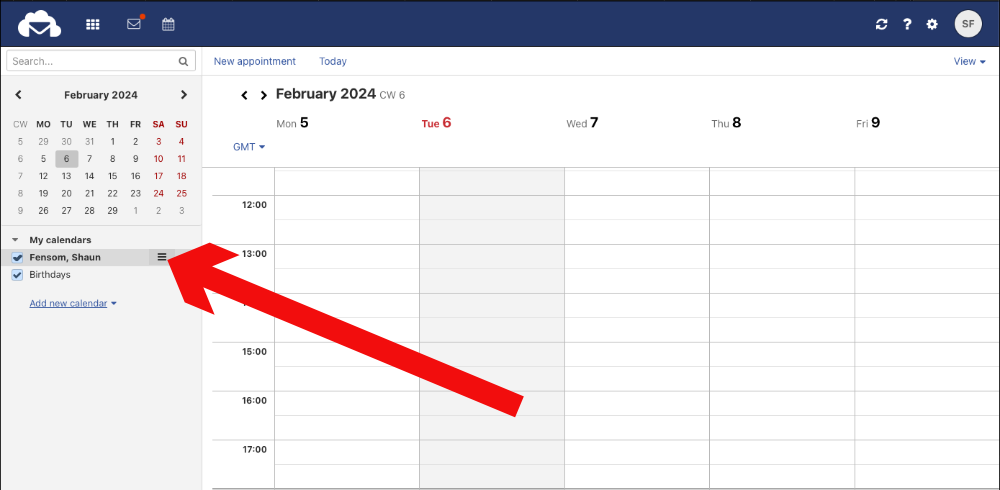
This opens up the calendar, and you'll see your calendar (you may have more than one) listed on the left hand side under the heading 'My calendars'. Click to select the calendar that you wish to export. When you select a calendar, you'll see a small three-bar icon or button to the right of the calendar name.
This is called a hamburger menu, and if you click it, you'll see a pop-up menu appear with various options available. The option you are looking for is the 'Export' command (see the image below highlighting the 'Export' option.
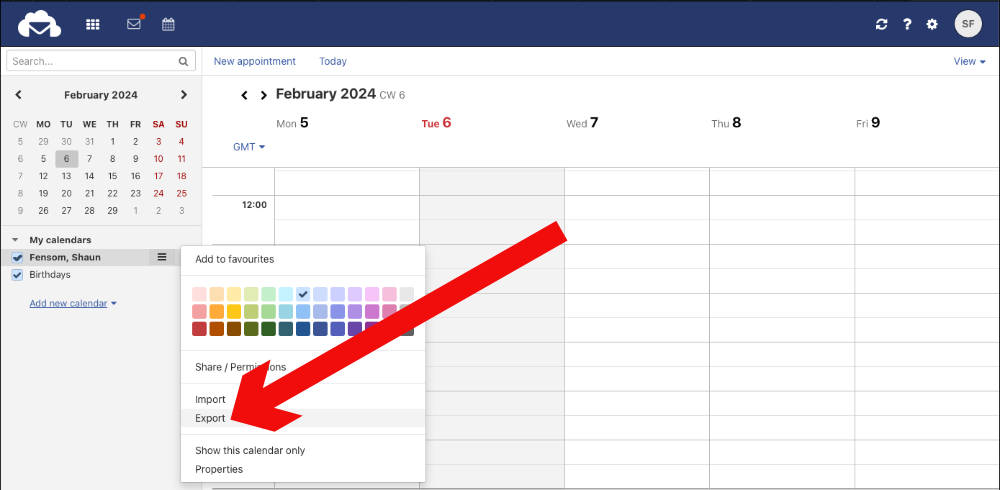
Clicking on this Export link will download a file to your computer. The file will be called something like 'Calendar.ics' and will be saved on your computer in the location to where you normally save downloads. Depending on your computer you may be given the option as to where to save the file – put it somewhere where you'll easily be able to find it.
That's the export step completed. This 'Calendar.ics' file contains all of the data about the events stored in the selected calendar. If you have more than one calendar that you want to move, you can go back through these steps, selecting and then exporting each calendar in turn.
Having downloaded all of the calendar information that you want to keep, the next step will let you upload or import this data into your new mail.coop calendar system.
Log in to your new mail.coop account at https://webmail.mail.coop.
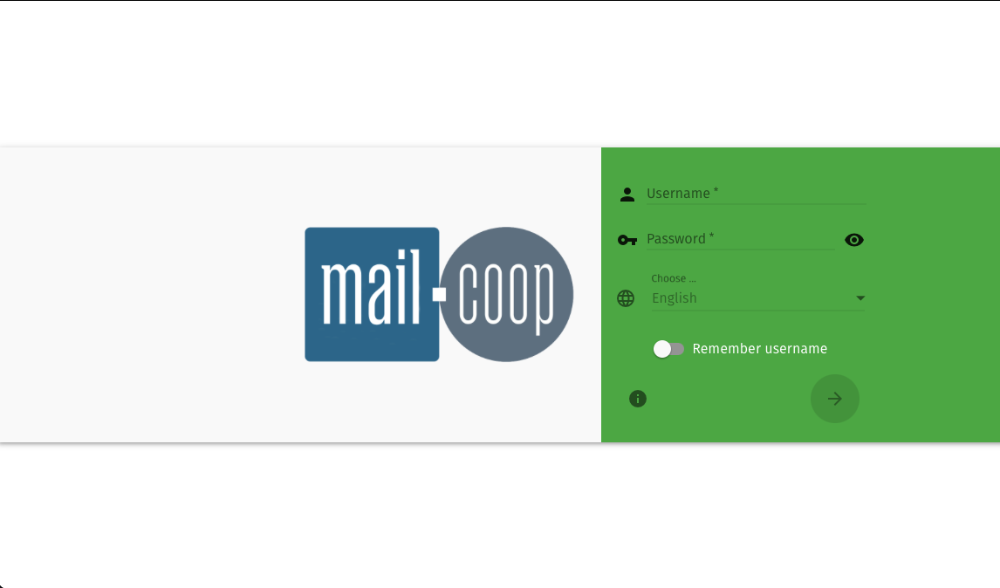
Don't forget that in order to log in here you need to enter your mail.coop username, and the password that is linked to that username. Don't get this login confused with the username/password you used earlier to access your old account.
Once successfully logged in here you'll need to navigate to the calendar for the new account. Again, there's an icon in the top menu bar, this time towards the right of the window - see the screenshot below.
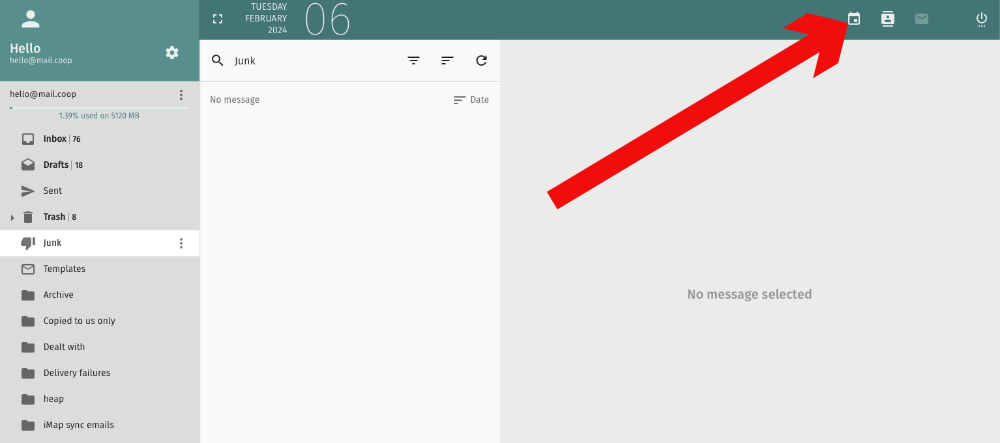
Clicking on this calendar icon gives you access to the calendar area, with a list of options down the left hand side. You'll likely see a default 'Personal Calendar' listed there. You can use this calendar to get started (you can always rename it).
To the right of the 'Personal Calendar' entry you'll see three dots arranged vertically.
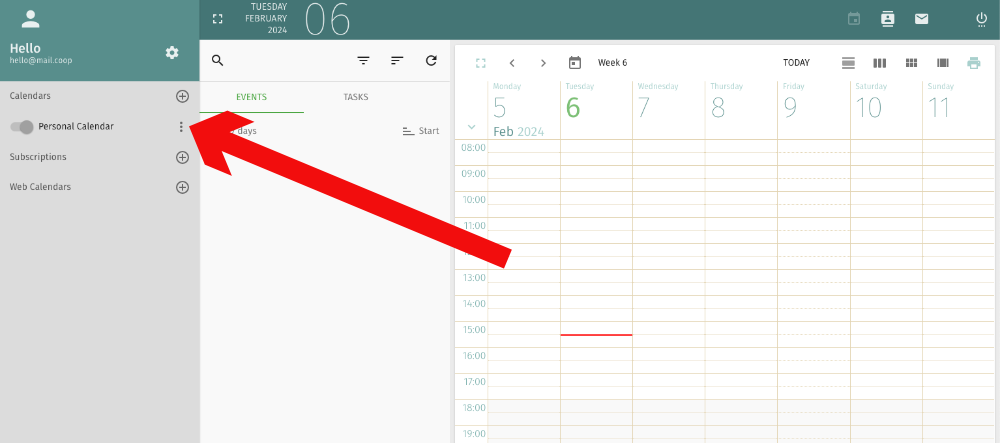
Clicking on this will open up a menu offering some options for the calendar. We're interested in the 'Import' option at the bottom of the list.
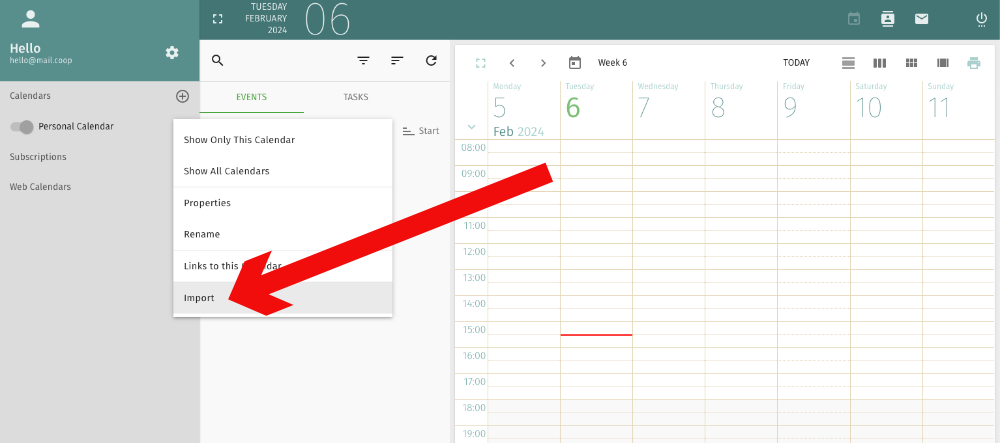
Click on 'Import' and you'll be presented with a dialog box enabling you to upload an 'ICS' file.
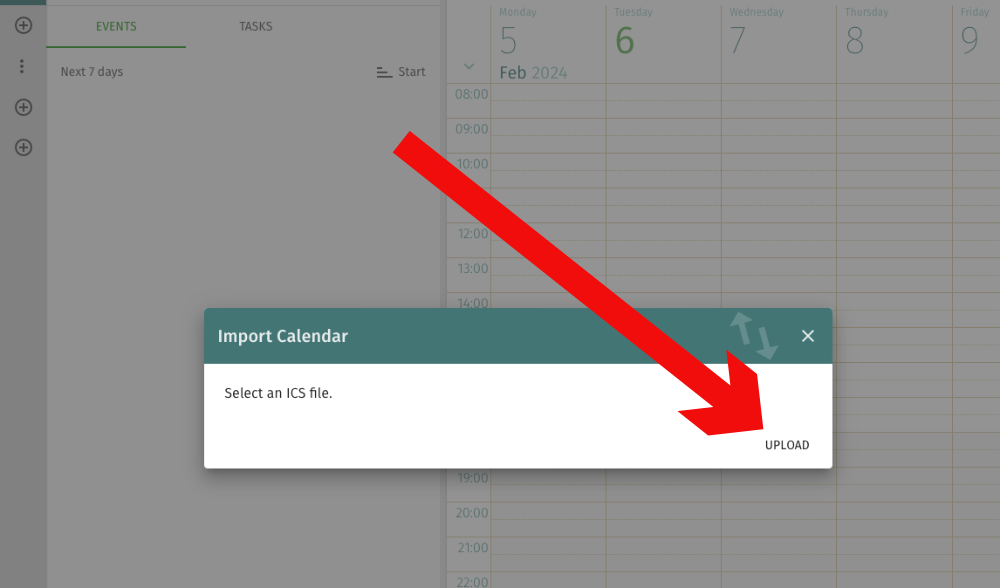
Click on the 'UPLOAD' link, find the file on your computer called 'Calendar.ics' and upload it.
That's it. You've successfully uploaded your calendar information.
If you have multiple calendars to move, and you have already exported them, you can simply create new calendars to suit by clicking on the big '+' symbol to the right of 'Calendars' for each one, giving it a useful name, then importing the relevant ICS file.
